Server-Side Tracking: Complete Setup Guide Without Cookies
Why Server-Side Tracking Changes Everything
Your analytics data is disappearing. Between ad blockers, browser privacy restrictions, and users declining cookie consent, client-side tracking now misses 20-40% of actual website activity. I’ve watched this gap widen steadily over the past five years across dozens of implementations.
Server-side tracking flips the model. Instead of relying on JavaScript tags in the browser, you collect data on your own server — where ad blockers can’t touch it and cookies become optional. The result is more complete, more accurate data that respects user privacy by design.
This guide walks you through a complete server-side tracking implementation. You’ll go from understanding the architecture to having a working setup that captures reliable analytics without depending on third-party cookies.
Prerequisites
Before you start, make sure you have:
- A web server you control (Node.js, Python, PHP, or similar)
- Basic familiarity with HTTP requests and server-side code
- Access to your DNS settings (for first-party data collection)
- An analytics platform that accepts server-side events (Umami, Matomo, PostHog, or a custom data store)
You don’t need to be a backend expert. If you can deploy a basic web application, you can implement server-side tracking.
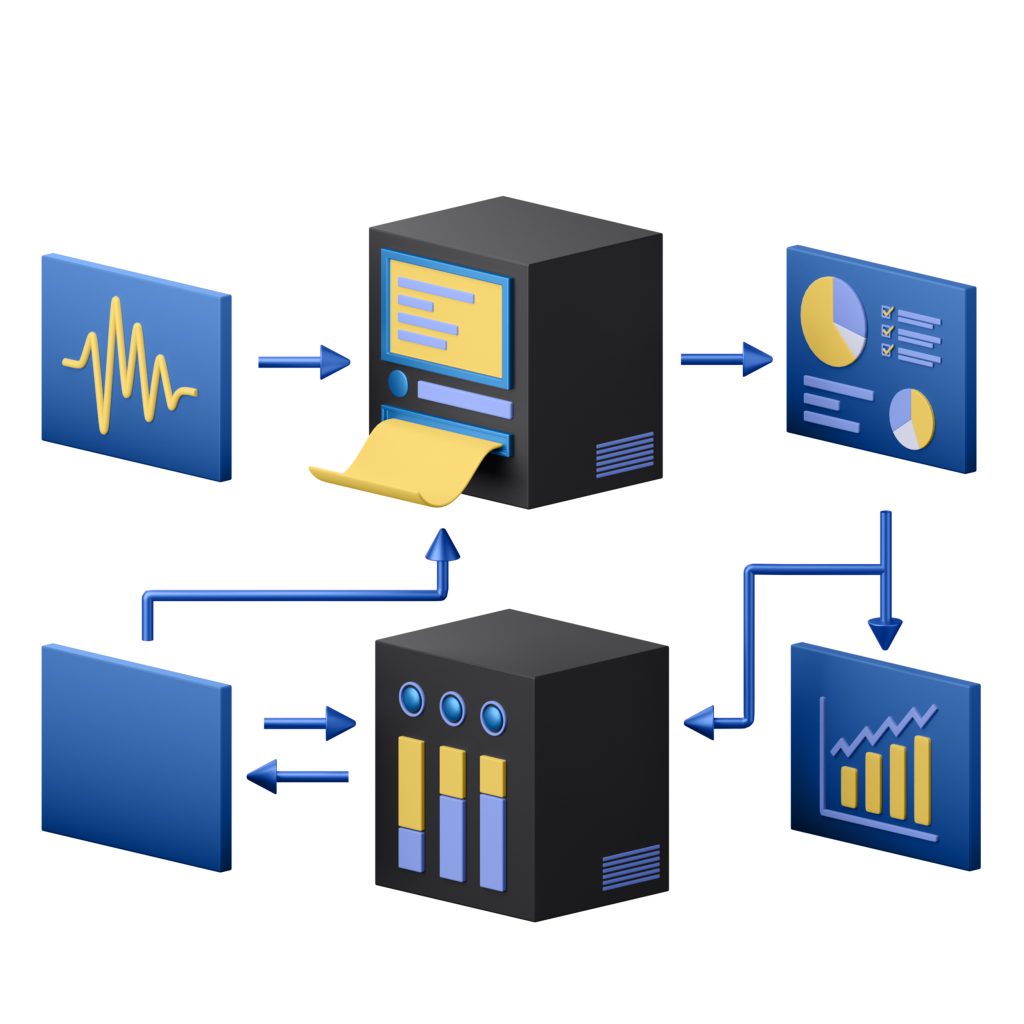
How Server-Side Tracking Works
In a traditional client-side setup, a JavaScript snippet runs in the visitor’s browser. It collects page views, events, and user data, then sends it directly to your analytics provider. The problem? The browser is hostile territory. Ad blockers intercept requests. Privacy extensions strip identifiers. ITP and ETP limit cookie lifespans to hours or days.
Server-side tracking moves data collection to your backend. When a user visits your site, your server processes the request and forwards relevant data to your analytics platform — from server to server, completely bypassing the browser’s restrictions.
Client-Side vs. Server-Side: Architecture Comparison
| Aspect | Client-Side Tracking | Server-Side Tracking |
|---|---|---|
| Where code runs | User’s browser | Your server |
| Ad blocker impact | High — requests often blocked | None — server-to-server communication |
| Cookie dependency | Requires third-party or first-party cookies | Optional — can use server-side session IDs |
| Data accuracy | 60-80% of actual traffic | 95%+ of actual traffic |
| Page load impact | Adds JavaScript weight to page | Zero client-side overhead |
| Data control | Data passes through third-party servers | Full control — data stays on your infrastructure |
| Implementation effort | Low — paste a snippet | Medium — requires server configuration |
The trade-off is clear: more implementation work upfront, but dramatically better data quality and privacy compliance long-term. If you’re building first-party data tracking without cookies, server-side collection is the foundation you need.
Step 1: Design Your Data Collection Endpoint
The core of server-side tracking is an endpoint on your server that receives and processes analytics events. Think of it as your own mini analytics API.
Here’s a basic Node.js (Express) implementation:
const express = require('express');
const crypto = require('crypto');
const app = express();

app.use(express.json());

// Analytics collection endpoint
app.post('/api/collect', (req, res) => {
  const event = {
    timestamp: new Date().toISOString(),
    event_type: req.body.event || 'pageview',
    page_url: req.body.url || req.headers.referer,
    user_agent: req.headers['user-agent'],
    ip_hash: crypto
      .createHash('sha256')
      .update(req.ip + process.env.SALT)
      .digest('hex')
      .substring(0, 16),
    referrer: req.body.referrer || req.headers.referer,
    session_id: req.body.session_id || generateSessionId(req),
    properties: req.body.properties || {}
  };

  // Forward to your analytics backend
  processEvent(event);

  res.status(202).json({ status: 'accepted' });
});
A few important details in this code. The IP address is hashed with a salt — you never store raw IP addresses. The session_id can come from the client or be generated server-side. And the response returns 202 Accepted to avoid blocking the user’s request.
Generating Privacy-Safe Session Identifiers
Without cookies, you need another way to group events into sessions. Here’s an approach that creates a session identifier from request characteristics without storing any personal data:
function generateSessionId(req) {
  const components = [
    req.headers['user-agent'],
    req.headers['accept-language'],
    req.ip,
    new Date().toISOString().split('T')[0], // Rotates daily
    process.env.SESSION_SALT
  ];

  return crypto
    .createHash('sha256')
    .update(components.join('|'))
    .digest('hex')
    .substring(0, 24);
}
This produces a consistent identifier for the same visitor within the same day, but it can’t be reversed to identify anyone. The daily rotation means you get session-level insights without persistent tracking — a pattern I’ve used successfully in privacy-first analytics setups for multiple clients.
Step 2: Capture Events From Your Application
With your collection endpoint ready, you need to send events to it. There are three main approaches, and in practice, most implementations use a combination.
Approach A: Server-Side Middleware
The simplest method intercepts requests at the server level. Every page load automatically generates an event without any client-side code:
// Express middleware for automatic pageview tracking
function trackPageview(req, res, next) {
  // Skip static assets and API routes
  if (req.path.match(/\.(js|css|png|jpg|svg|ico)$/) || req.path.startsWith('/api/')) {
    return next();
  }

  const event = {
    event_type: 'pageview',
    page_url: `${req.protocol}://${req.hostname}${req.originalUrl}`,
    referrer: req.headers.referer || null,
    user_agent: req.headers['user-agent'],
    timestamp: new Date().toISOString()
  };

  // Process asynchronously — don't block the response
  processEvent(event).catch(err => console.error('Tracking error:', err));

  next();
}

app.use(trackPageview);
This captures every page view at the server level. Ad blockers are irrelevant because no client-side JavaScript is involved.
Approach B: Lightweight Client-Side Events
For interactive events like button clicks or form submissions, you’ll still need some client-side code. The key difference from traditional tracking is that you send events to your own server, not a third party:
// Minimal client-side event tracker
const tracker = {
  endpoint: '/api/collect',

  track(eventName, properties = {}) {
    const payload = {
      event: eventName,
      url: window.location.href,
      referrer: document.referrer,
      properties: properties,
      timestamp: Date.now()
    };

    // Use sendBeacon for reliability on page unload
    if (navigator.sendBeacon) {
      navigator.sendBeacon(
        this.endpoint,
        new Blob([JSON.stringify(payload)], { type: 'application/json' })
      );
    } else {
      fetch(this.endpoint, {
        method: 'POST',
        headers: { 'Content-Type': 'application/json' },
        body: JSON.stringify(payload),
        keepalive: true
      });
    }
  }
};

// Usage
tracker.track('button_click', { button_id: 'signup-cta' });
tracker.track('form_submit', { form_name: 'contact' });
Because this sends requests to your own domain (not a third-party analytics service), most ad blockers won’t interfere. The Navigator.sendBeacon API ensures events fire reliably even when the user navigates away from the page.
Approach C: Server-Side Event Forwarding
If you use a platform like Matomo or PostHog, you can forward events from your server directly to their ingestion API:
const axios = require('axios');

async function forwardToAnalytics(event) {
  try {
    await axios.post('https://your-matomo-instance.com/matomo.php', {
      idsite: 1,
      rec: 1,
      action_name: event.page_title,
      url: event.page_url,
      urlref: event.referrer,
      ua: event.user_agent,
      cip: event.ip_hash, // Anonymized IP
      cdt: event.timestamp
    }, {
      timeout: 5000
    });
  } catch (error) {
    // Queue for retry — never lose events
    await eventQueue.push(event);
  }
}
Step 3: Set Up First-Party Data Collection
For server-side tracking to work reliably, your collection endpoint should live on your primary domain. This is what makes it truly first-party.
DNS Configuration
If your analytics processing runs on a separate server, set up a subdomain that points to it:
# DNS A Record
analytics.yourdomain.com  →  YOUR_ANALYTICS_SERVER_IP

# Or use a CNAME if your analytics server has its own domain
analytics.yourdomain.com  →  CNAME  →  your-collector.example.com
Nginx Reverse Proxy
Alternatively, proxy analytics requests through your existing web server. This is my preferred approach because it requires no additional DNS setup:
# nginx.conf
location /api/collect {
    proxy_pass http://localhost:3000/api/collect;
    proxy_set_header X-Real-IP $remote_addr;
    proxy_set_header X-Forwarded-For $proxy_add_x_forwarded_for;
    proxy_set_header Host $host;

    # Don't buffer analytics requests
    proxy_buffering off;

    # Timeout settings
    proxy_connect_timeout 5s;
    proxy_read_timeout 10s;
}
The critical point: all data collection happens under your domain. The browser sees a same-origin request, which means no CORS issues, no third-party cookie restrictions, and no ad blocker interference. This is the technical backbone of effective cross-channel analytics across your properties.
Step 4: Implement Data Processing and Storage
Raw events need processing before they become useful analytics. Here’s a processing pipeline that handles validation, enrichment, and storage:
const { Pool } = require('pg');
const geoip = require('geoip-lite');
const UAParser = require('ua-parser-js');

const pool = new Pool({ connectionString: process.env.DATABASE_URL });

async function processEvent(event) {
  // 1. Validate required fields
  if (!event.page_url || !event.event_type) {
    throw new Error('Missing required fields');
  }

  // 2. Parse user agent
  const ua = new UAParser(event.user_agent);
  const browser = ua.getBrowser();
  const os = ua.getOS();
  const device = ua.getDevice();

  // 3. Geo lookup (from hashed IP — use raw IP before hashing)
  const geo = geoip.lookup(event.raw_ip);

  // 4. Build enriched event
  const enriched = {
    ...event,
    browser_name: browser.name,
    browser_version: browser.version,
    os_name: os.name,
    device_type: device.type || 'desktop',
    country: geo?.country || 'unknown',
    region: geo?.region || 'unknown',
    // Parse URL components
    pathname: new URL(event.page_url).pathname,
    hostname: new URL(event.page_url).hostname,
    query_params: new URL(event.page_url).search
  };

  // 5. Remove raw IP before storage
  delete enriched.raw_ip;

  // 6. Store
  await pool.query(
    `INSERT INTO events
      (timestamp, event_type, page_url, pathname,
       session_id, browser_name, os_name, device_type,
       country, referrer, properties)
     VALUES ($1,$2,$3,$4,$5,$6,$7,$8,$9,$10,$11)`,
    [
      enriched.timestamp,
      enriched.event_type,
      enriched.page_url,
      enriched.pathname,
      enriched.session_id,
      enriched.browser_name,
      enriched.os_name,
      enriched.device_type,
      enriched.country,
      enriched.referrer,
      JSON.stringify(enriched.properties)
    ]
  );
}
Database Schema
Here’s a PostgreSQL schema designed for analytics queries. The partitioning by month keeps queries fast as your data grows:
CREATE TABLE events (
  id          BIGSERIAL,
  timestamp   TIMESTAMPTZ NOT NULL,
  event_type  VARCHAR(50) NOT NULL,
  page_url    TEXT NOT NULL,
  pathname    VARCHAR(500),
  session_id  VARCHAR(64),
  browser_name VARCHAR(50),
  os_name     VARCHAR(50),
  device_type VARCHAR(20) DEFAULT 'desktop',
  country     VARCHAR(2),
  referrer    TEXT,
  properties  JSONB DEFAULT '{}'
) PARTITION BY RANGE (timestamp);

-- Create monthly partitions
CREATE TABLE events_2026_04 PARTITION OF events
  FOR VALUES FROM ('2026-04-01') TO ('2026-05-01');

-- Indexes for common queries
CREATE INDEX idx_events_timestamp ON events (timestamp);
CREATE INDEX idx_events_session ON events (session_id);
CREATE INDEX idx_events_pathname ON events (pathname);
CREATE INDEX idx_events_type ON events (event_type);
Step 5: Handle Consent and Privacy Correctly
Server-side tracking doesn’t automatically exempt you from privacy regulations. But it does give you much more control over what data you collect and how you process it.
Privacy-By-Default Configuration
const PRIVACY_CONFIG = {
  // Data collected without consent (anonymized, no personal data)
  base_level: {
    collect_page_url: true,
    collect_referrer: true,
    collect_user_agent: true,    // Parsed to browser/OS only
    collect_country: true,       // Country-level geo only
    hash_ip: true,               // Never store raw IPs
    session_tracking: false,     // No session linking
    store_raw_ua: false          // Don't store full UA string
  },

  // Additional data with consent
  consent_level: {
    session_tracking: true,      // Link events into sessions
    collect_city: true,          // City-level geo
    custom_properties: true,     // Custom event properties
    cross_session_id: true       // Returning visitor detection
  }
};

function getTrackingConfig(hasConsent) {
  if (hasConsent) {
    return { ...PRIVACY_CONFIG.base_level, ...PRIVACY_CONFIG.consent_level };
  }
  return PRIVACY_CONFIG.base_level;
}
This two-tier approach means you always get basic, anonymized traffic data. With explicit consent, you unlock session-level insights. In my experience, this strikes the right balance — you get enough data to make decisions without invasive tracking.
The W3C Tracking Protection specification provides useful context on standards-based approaches to privacy signals.
Step 6: Implement Bot Filtering
One often-overlooked advantage of server-side tracking is the ability to filter bots before they pollute your data. Client-side analytics tools struggle with this because sophisticated bots can execute JavaScript. On the server side, you have access to much richer signals.
const isBot = require('isbot');

function filterBots(req) {
  const ua = req.headers['user-agent'] || '';

  // Check against known bot patterns
  if (isBot(ua)) {
    return true;
  }

  // Additional heuristics
  const suspiciousSignals = [
    !req.headers['accept-language'],          // Real browsers always send this
    !req.headers['accept-encoding'],          // Bots often skip this
    req.headers['x-forwarded-for']?.split(',').length > 5  // Excessive proxy chain
  ];

  return suspiciousSignals.filter(Boolean).length >= 2;
}

// Use in your collection middleware
app.post('/api/collect', (req, res) => {
  if (filterBots(req)) {
    metrics.increment('collect.bot_filtered');
    return res.status(202).json({ status: 'filtered' });
  }

  // Process legitimate events...
});
In production, I’ve seen bot filtering reduce raw event volume by 15-30% while improving data quality dramatically. Your bounce rate drops, session duration becomes more meaningful, and conversion rates reflect real human behavior.
Step 7: Build a Forwarding Layer for Third-Party Tools
Most teams still need to send some data to external tools — your email platform, A/B testing service, or CRM. Server-side tracking lets you control exactly what data leaves your infrastructure:
class EventRouter {
  constructor() {
    this.destinations = [];
  }

  addDestination(name, handler, filter = () => true) {
    this.destinations.push({ name, handler, filter });
  }

  async route(event) {
    const tasks = this.destinations
      .filter(dest => dest.filter(event))
      .map(dest =>
        dest.handler(event).catch(err => {
          console.error(`Failed to send to ${dest.name}:`, err.message);
        })
      );

    await Promise.allSettled(tasks);
  }
}

// Configure destinations
const router = new EventRouter();

// Send all events to your analytics database
router.addDestination('database', storeInDatabase);

// Send conversions to your CRM
router.addDestination(
  'crm',
  sendToCRM,
  event => event.event_type === 'conversion'
);

// Send pageviews to your analytics dashboard
router.addDestination(
  'umami',
  forwardToUmami,
  event => event.event_type === 'pageview'
);
This pattern is powerful. You collect data once and distribute it to multiple destinations with full control over what each one receives. Need to stop sending data to a vendor? Remove the destination — no tag changes needed.
Testing Your Server-Side Tracking Setup
I’ve seen too many tracking implementations deployed without proper testing. Server-side tracking is harder to debug than client-side because you can’t just open browser DevTools. Here’s a systematic approach.
Unit Testing Your Collection Endpoint
// test/collect.test.js
const request = require('supertest');
const app = require('../app');

describe('POST /api/collect', () => {
  it('accepts valid pageview events', async () => {
    const res = await request(app)
      .post('/api/collect')
      .send({
        event: 'pageview',
        url: 'https://example.com/page',
        referrer: 'https://google.com'
      })
      .expect(202);

    expect(res.body.status).toBe('accepted');
  });

  it('rejects events without required fields', async () => {
    await request(app)
      .post('/api/collect')
      .send({ properties: { random: 'data' } })
      .expect(400);
  });

  it('hashes IP addresses before storage', async () => {
    // Send event and check the stored record
    await request(app)
      .post('/api/collect')
      .send({ event: 'pageview', url: 'https://example.com' });

    const stored = await getLastEvent();
    expect(stored.ip_hash).toBeDefined();
    expect(stored.raw_ip).toBeUndefined();
  });
});
Integration Testing With cURL
Fire test events from the command line to verify your endpoint is responding correctly:
# Send a test pageview
curl -X POST https://yourdomain.com/api/collect \
  -H "Content-Type: application/json" \
  -d '{
    "event": "pageview",
    "url": "https://yourdomain.com/test-page",
    "referrer": "https://google.com",
    "properties": { "test": true }
  }'

# Verify the event was stored
curl https://yourdomain.com/api/events/recent?limit=1

# Load test with multiple concurrent requests
for i in $(seq 1 100); do
  curl -s -X POST https://yourdomain.com/api/collect \
    -H "Content-Type: application/json" \
    -d "{\"event\":\"pageview\",\"url\":\"https://yourdomain.com/page-$i\"}" &
done
wait
Monitoring and Alerting
Set up monitoring to catch tracking failures before they become data gaps. Here’s what I always monitor:
- Event volume: Alert if hourly event count drops below 50% of the 7-day average
- Error rate: Alert if more than 5% of collection requests return errors
- Latency: Alert if p95 response time exceeds 200ms
- Queue depth: Alert if failed-event retry queue grows beyond 1,000 items
// Simple monitoring middleware
function monitorTracking(req, res, next) {
  const start = Date.now();

  res.on('finish', () => {
    const duration = Date.now() - start;
    metrics.histogram('collect.latency', duration);
    metrics.increment('collect.requests', { status: res.statusCode });

    if (res.statusCode >= 400) {
      metrics.increment('collect.errors');
    }
  });

  next();
}
Troubleshooting Common Issues
After implementing server-side tracking for numerous projects, these are the problems I see most often:
Events Not Appearing in Analytics
- Check that your collection endpoint is accessible from the public internet (not just localhost)
- Verify the
Content-Type: application/jsonheader is being sent - Check server logs for 4xx/5xx responses
- Ensure your database connection pool isn’t exhausted under load
Session Identification Inconsistencies
- If using IP + User-Agent hashing, remember that users behind the same corporate proxy will share a session ID
- Mobile users switching between WiFi and cellular will generate new sessions
- Consider falling back to a lightweight first-party cookie (with consent) for better session accuracy
High Latency on Collection Endpoint
- Always process events asynchronously — accept the request immediately, process later
- Use a message queue (Redis, RabbitMQ) between collection and processing
- Batch database inserts instead of writing one row per event
Data Discrepancies With Client-Side Tracking
If you’re running server-side alongside existing client-side tracking, expect the server-side numbers to be 15-40% higher. That’s not a bug — it’s the data you’ve been missing. The web.dev performance measurement guides discuss similar accuracy challenges with client-side collection.
Production Checklist
Before going live, walk through this checklist. I’ve learned the hard way that skipping any of these steps leads to problems:
| Check | Status | Details |
|---|---|---|
| HTTPS enabled on collection endpoint | Required | All analytics traffic must be encrypted |
| IP addresses hashed or anonymized | Required | Never store raw IPs |
| Rate limiting configured | Required | Prevent abuse and bot spam |
| Error handling and retry queue | Required | No silent data loss |
| Bot filtering | Recommended | Filter known crawlers and bots from analytics |
| Data retention policy | Required | Auto-delete raw events after defined period |
| Backup strategy | Required | Regular database backups |
| Load testing completed | Recommended | Verify endpoint handles peak traffic |
| Monitoring and alerts active | Required | Detect tracking failures within minutes |
| Privacy policy updated | Required | Document your data collection practices |
Performance Considerations
Your analytics collection endpoint needs to handle traffic spikes without affecting your main application. Here are the performance patterns that have worked well in my implementations.
Async Processing With a Message Queue
Never process events synchronously in the request handler. Accept the event, push it to a queue, and process it in the background:
const Redis = require('ioredis');
const redis = new Redis(process.env.REDIS_URL);

// Fast: accept and queue
app.post('/api/collect', async (req, res) => {
  await redis.lpush('analytics:events', JSON.stringify({
    ...req.body,
    _meta: {
      ip: req.ip,
      ua: req.headers['user-agent'],
      received_at: Date.now()
    }
  }));
  res.status(202).json({ status: 'accepted' });
});

// Separate worker: process from queue in batches
async function processEventBatch() {
  const batch = await redis.lrange('analytics:events', 0, 99);
  if (batch.length === 0) return;

  const events = batch.map(JSON.parse).map(enrichEvent);
  await bulkInsertEvents(events);
  await redis.ltrim('analytics:events', batch.length, -1);
}

// Run processor every 2 seconds
setInterval(processEventBatch, 2000);
This pattern handles bursts gracefully. The collection endpoint responds in under 10ms regardless of backend processing time. The queue acts as a buffer, and batch inserts are dramatically faster than individual writes.
Connection Pooling and Resource Limits
Set explicit limits on database connections and request timeouts. I’ve seen analytics endpoints take down production databases by opening unlimited connections during traffic spikes:
const pool = new Pool({
  connectionString: process.env.DATABASE_URL,
  max: 10,                    // Max pool connections
  idleTimeoutMillis: 30000,   // Close idle connections after 30s
  connectionTimeoutMillis: 5000 // Fail fast if pool is exhausted
});
What Comes Next
Server-side tracking is a foundation, not a destination. Once you have reliable, privacy-compliant data collection running, you can build on it:
- Real-time dashboards — Stream events to a visualization tool for live traffic monitoring
- Custom attribution models — With complete data, your attribution becomes far more accurate
- A/B testing infrastructure — Server-side experiments that don’t flicker or get blocked
- Data warehouse integration — Forward events to BigQuery, ClickHouse, or Snowflake for deep analysis
The shift from client-side to server-side tracking isn’t just a technical migration. It’s a fundamental improvement in how you collect data — more accurate, more private, and fully under your control. In my 12 years working with analytics platforms, I’ve never seen a team regret making this move.
Start with basic pageview tracking on a single property. Get comfortable with the data pipeline. Then expand to events, multiple domains, and third-party integrations. The MDN HTTP Headers reference is invaluable as you work with the request data your server receives.
Written by Alicia Bennett
Lead Web Analyst based in Toronto with 12+ years in digital analytics. Specializing in privacy-first tracking, open-source tools, and making data meaningful.
More about Alicia →Related Articles

Building a Privacy-First Data Layer: Step-by-Step
Your tracking data is only as good as your data layer. I’ve audited dozens of analytics implementations over the past…

12 On-Page Tactics to Improve Time on Page (With Tracking Tips)
Searchers are impatient. Pages that respect intent, read cleanly, and react to user behavior keep people around. This guide shows…
Event Tracking Architecture: Designing a Scalable Data Layer
Your event tracking is a mess. Don’t worry — I’ve audited enough analytics implementations to know that nearly every team…